Our Family to your Family :)

Established in the vibrant city of Davenport, Florida. Playforward Custom Playrooms prides itself on creating magical play spaces tailored to every child's imagination. Our starting of this endeavor was a simple one. As a close knit Jamaican Heritage family with new babies here and on the way, we wanted to help kids across the nation with the children in our family being the proof of concept. All of this is possible due to our team of dedicated designers and craftsmen, who specialize in crafting unique and innovative play areas that ignite creativity and foster a sense of wonder. In starting this journey, we have found the perfect formula that gives kids interactive fun and parents peace of mind knowing their children are enhancing their physical, mental and emotional health all while having a blast! 

FAQ

Can you walk me through the entire process?

Of course! So we sell ready made custom playrooms. They are all the same size which fit any standard bedroom. However, we can paint them any color you’d like. Then we ship them off to you and you install them with the help of our DIY instructions. Or if you’d like for us to install it, email us at playforwardfl@gmail.com and we will send over a free installation quote.

Are all of the custom playrooms the same size?

Yes, they are all the same size. They are built to fit a standard bedroom with 16 inch studs. While they are all the same size, we customize the colors to your liking.

Is shipping & installation free?

If you're located in the US, we ship the entire playroom for free. We do not install the playrooms, instead you can follow the DIY instructions we have on our website to install your playroom. Or if you’d rather have us install it for you, email: playforwardfl@gmail.com for a free installation quote.

How long for custom items to be built and shipped?

Custom items take up to 14 days to build and 7-10 business days to ship depending on shipping company.

Can I choose colors on my custom items?

Yes, you can choose up to 5 colors from our “Custom Color List” for us to customize your custom playroom order.

Can I track my order?

Yes, we provide the tracking information as soon as it’s shipped.

How long for my order to arrive?

Custom items can take up to 4 weeks to arrive after placing your order.

What is your cancellation policy?

We can alter or cancel any order within 24 hours and provide a full refund. After that deadline, all sales are final.

What payment methods do you accept?

We accept all major credit cards and PayPal.

Can I modify my order once it’s been placed?

Yes, you can modify your custom items color scheme within 24 hours. No modification requests will be accepted after 24 hours.

How do I contact customer service?

Send a message directly through the “Contact” page or email us at playforwardfl@gmail.com

What is your return policy?

We do not accept returns as these are custom items.

DIY Instructions

Instructions for Monkey Bars

Wall/Ceiling Monkey Bars

  • Remove items from package
  • Find studs in wall and ceiling and mark them
  • Screw wall bars directly to studs
  • Use provided lag screws to screw ceiling bars

Wooden Monkey Bars

  • Remove items from package
  • Attach the 3 pieces to one another. 2 pieces are for the sides and they’ll look exactly the same and the other piece is for the top.
  • Put together and use the nuts and bolts provided to form the complete monkey bar.
  • Screw extra wood provided between monkey bar side that will be anchored to the wall.
  • Find studs on wall and mark them.
  • Push monkey bars up against the marked studs and screw the monkey bars directly to the studs.
  • Place stickers that came with the product over the screws for a more finished look.
  • If you would like more support for the monkey bars, you can also use concrete screws and anchor it directly to the floor. (Not Included)

Instructions for Rock Climbing Wall

  • Remove items from package
  • Find studs on wall and mark them
  • Have someone place bottom half of the rock wall up against wall so you can ensure that it is leveled and screw into studs. 
  • Place top half of rock wall directly on top and follow the screws from bottom half to stay in line with the studs.
  • Screw evenly across surface of rock wall making sure to hit the studs. Roughly 18-24 screws total should be used.
  • Now that the rock wall is completely up and screwed to the wall. Place stickers that came with the product over the screws for a more finished look.

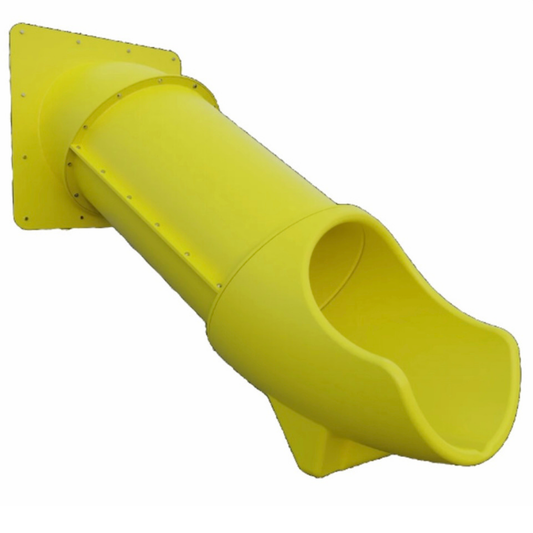
Instructions for Floating Loft and Tube Slide

  • Remove items from package.
  • Fully assemble the slide.
  • Screw arch piece to the loft in the pre drilled holes.
  • Screw small piece of wood that is provide to the arch. It will be used for extra support.
  • Find and mark the studs on corner wall.
  • Have 2 people lift the loft and mark 5 feet/60 inches which is the height you want it installed for the slide to fit snug and level it.
  • Screw loft directly to the marked studs as well as the support wood used to help anchor the loft.
  • For extra support, add the large piece of wood to the front corner of the loft. It will be used as a leg. Slightly lift front of loft with the wood in place and screw it.
  • Attach the wooden step ladder to the loft and screw them together. (You can also screw the step ladder to the wall for more support.)
  • Use lag screws provided to attach the slide to the arch/loft.
  • Add stabilizing wood to base of slide and mount to the floor.
  • Place stickers provided over the screws for a more finished look.


Tools needed:

Screwgun 

Level